LED Status Lights
less than a minute
The status lights are designed to provide an extra layer of quick and easy debugging to show the status of your drone at a glance.
To complete the status light installation you will need the following.
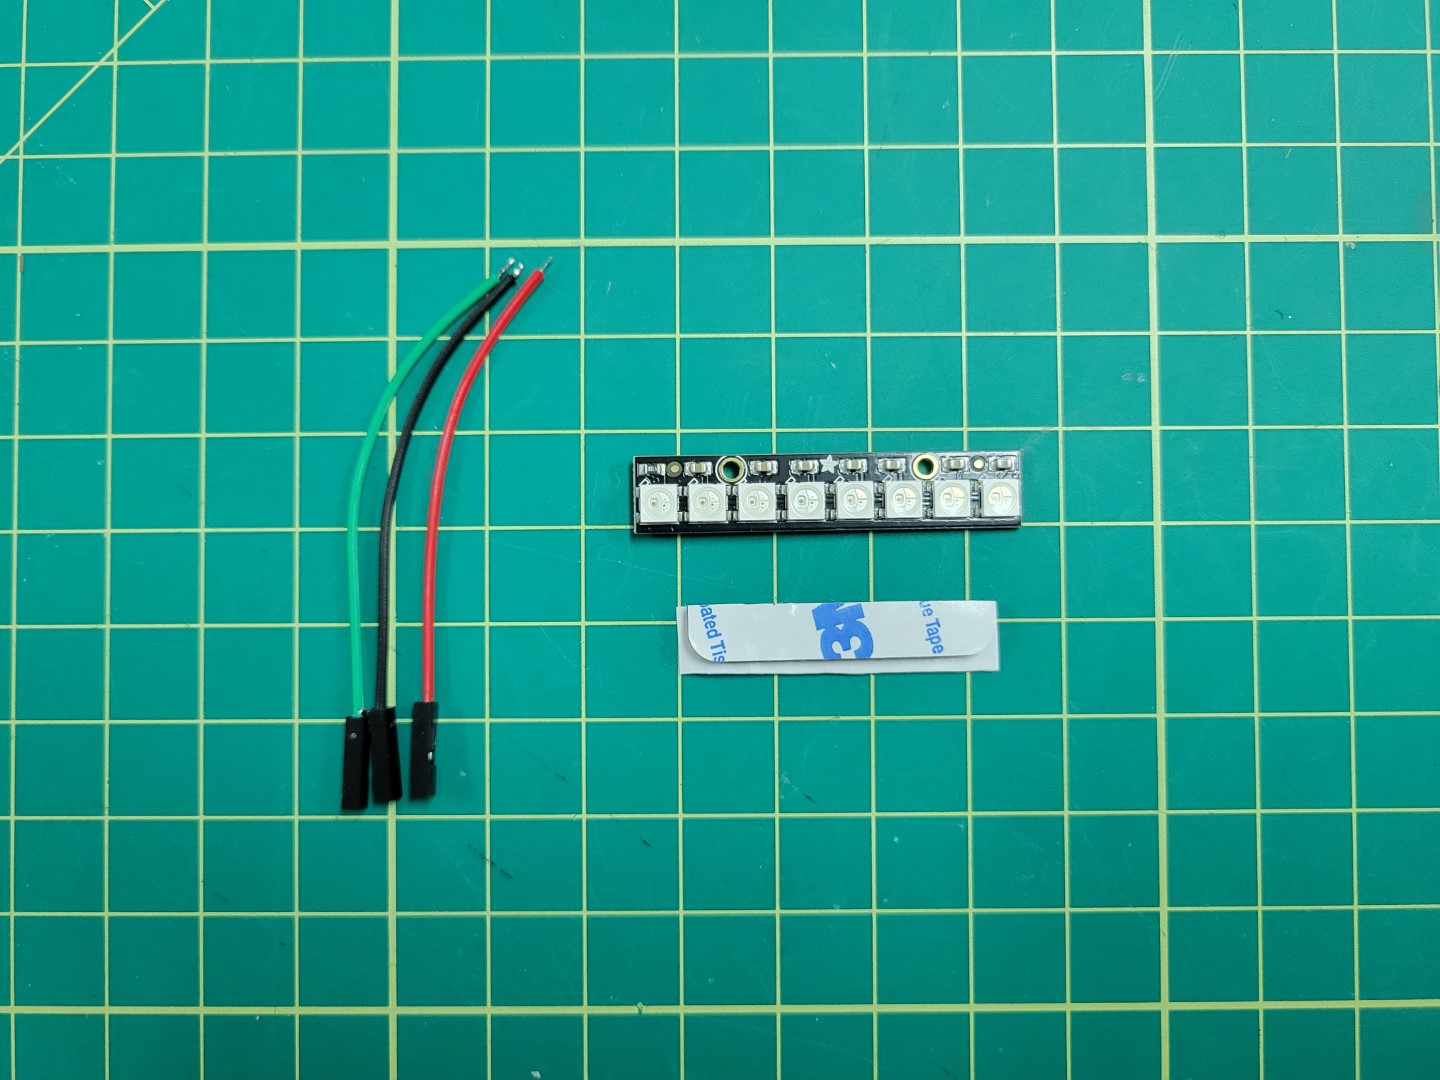
Components with wires cut to 3"
Wiring
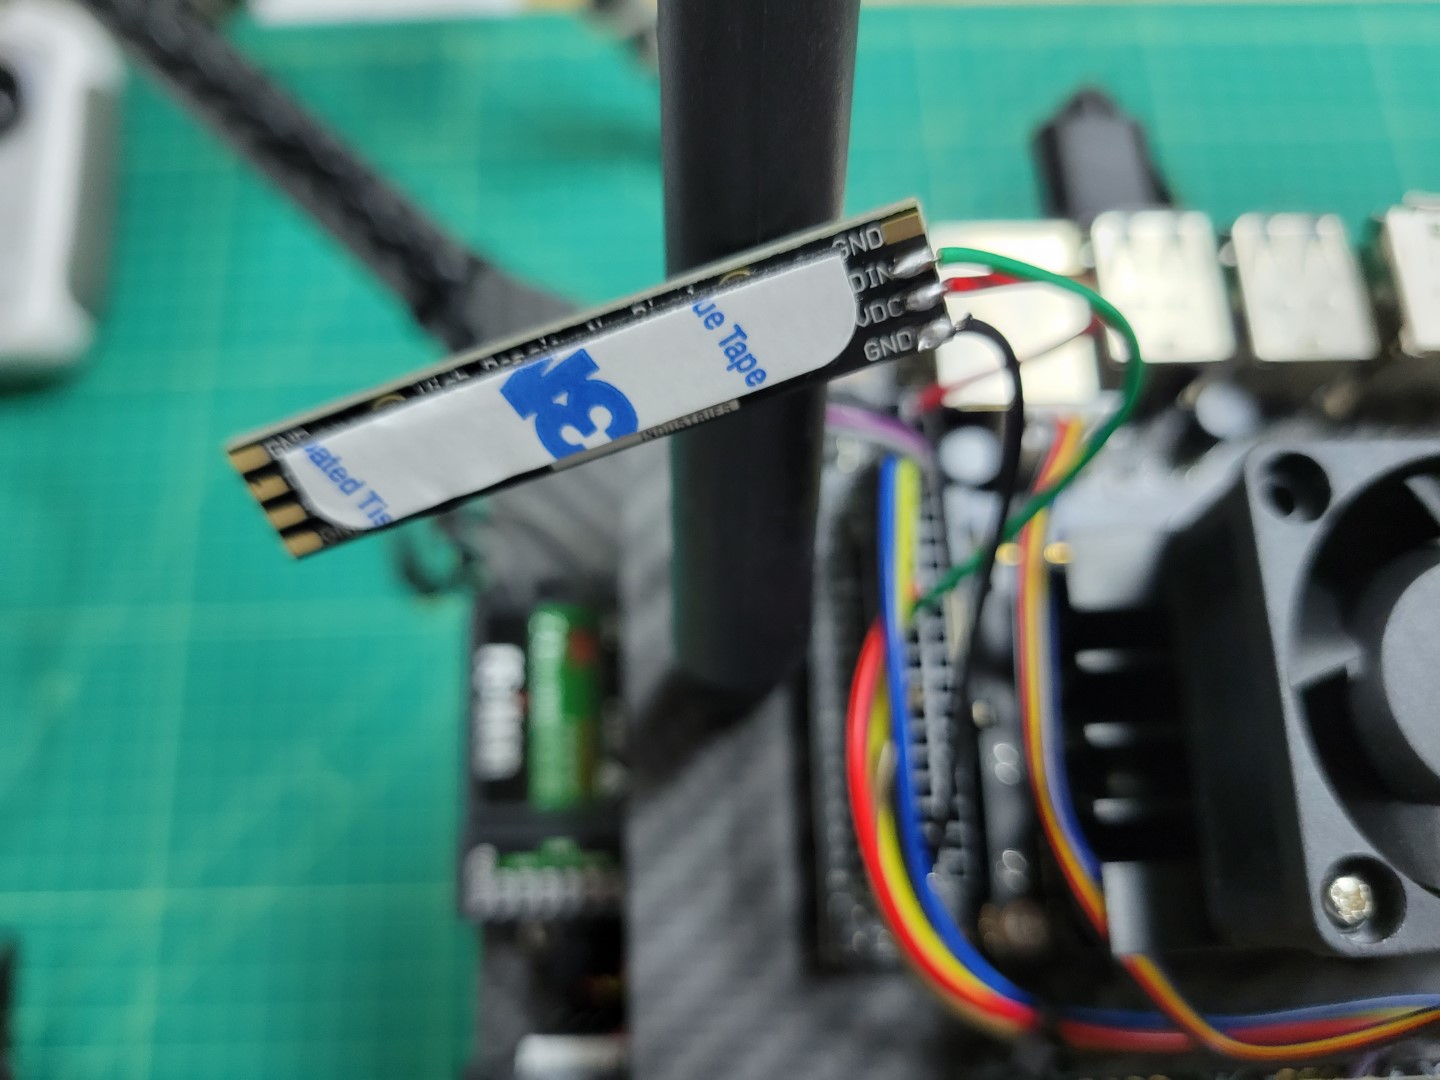
Wire the green wire to DIN, red wire to 5VDC, and black wire to Ground. Remove the plastic housing from other end of the wires.
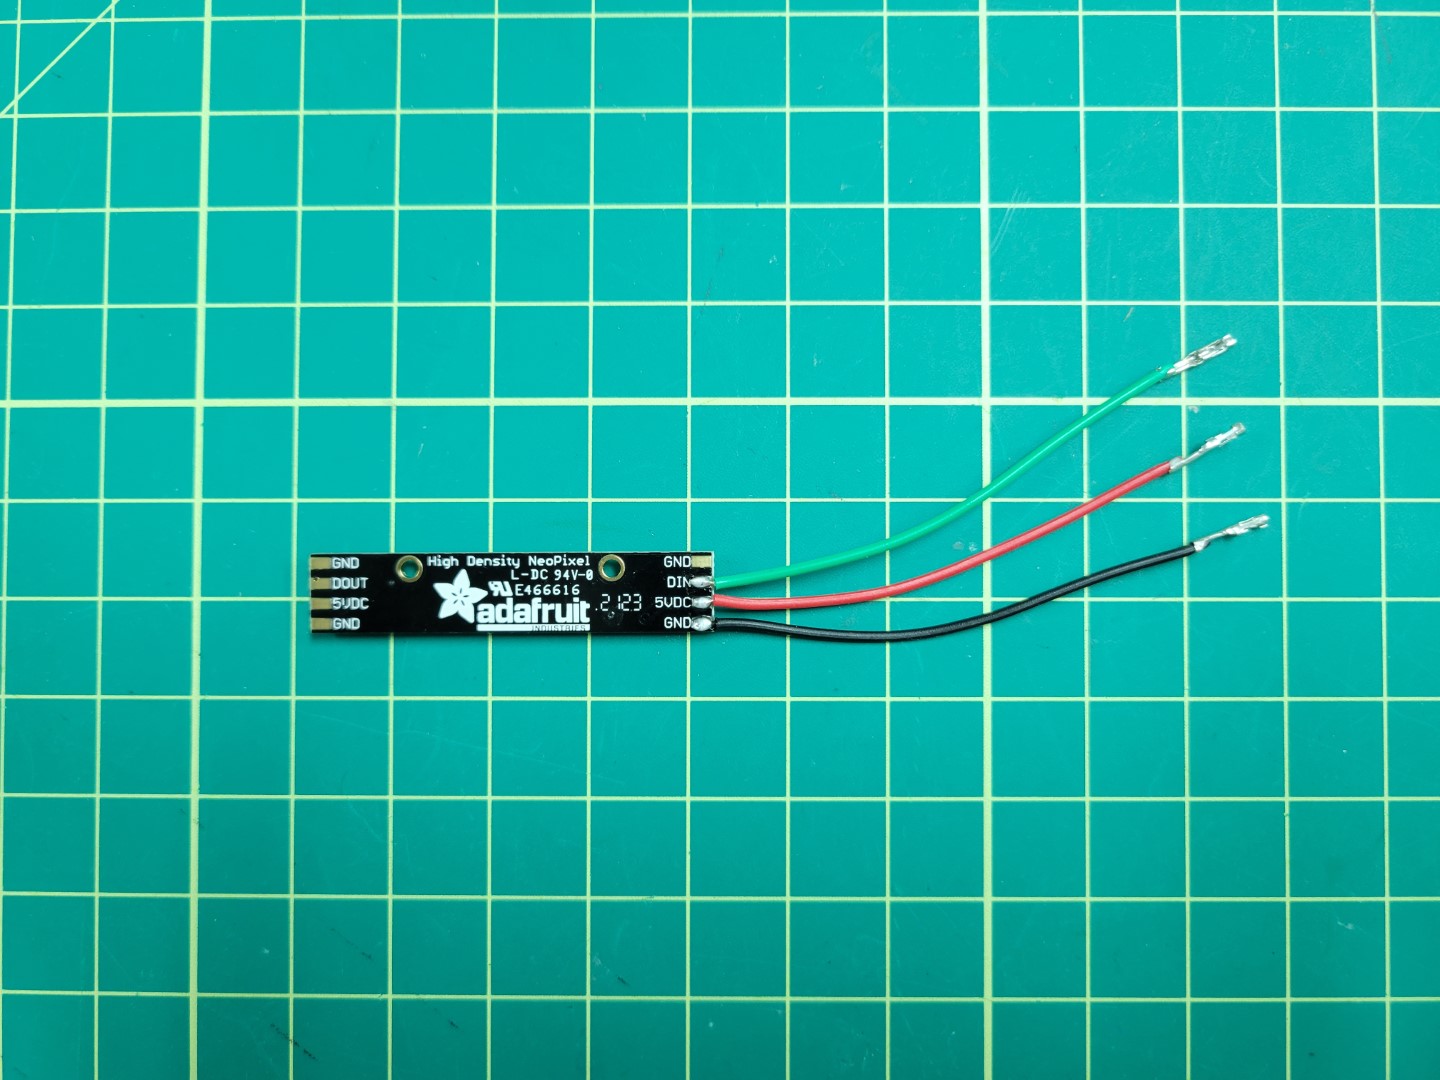
LED soldered and ready for VMC wiring
Insert wires into VMC housing per the following wiring diagram.
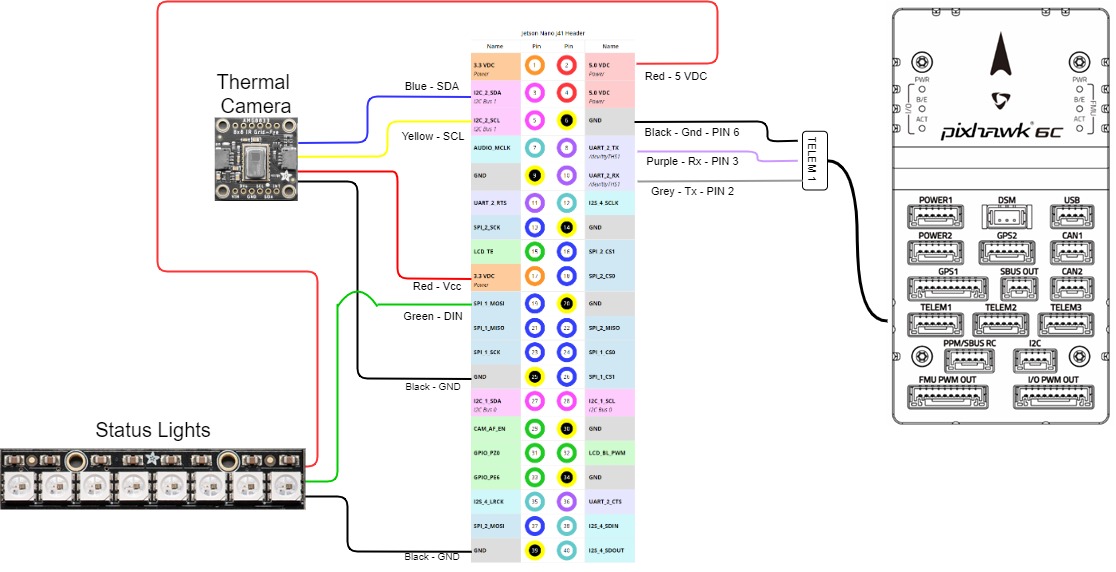
Jetson Header Wiring Diagram
This should result in the following.
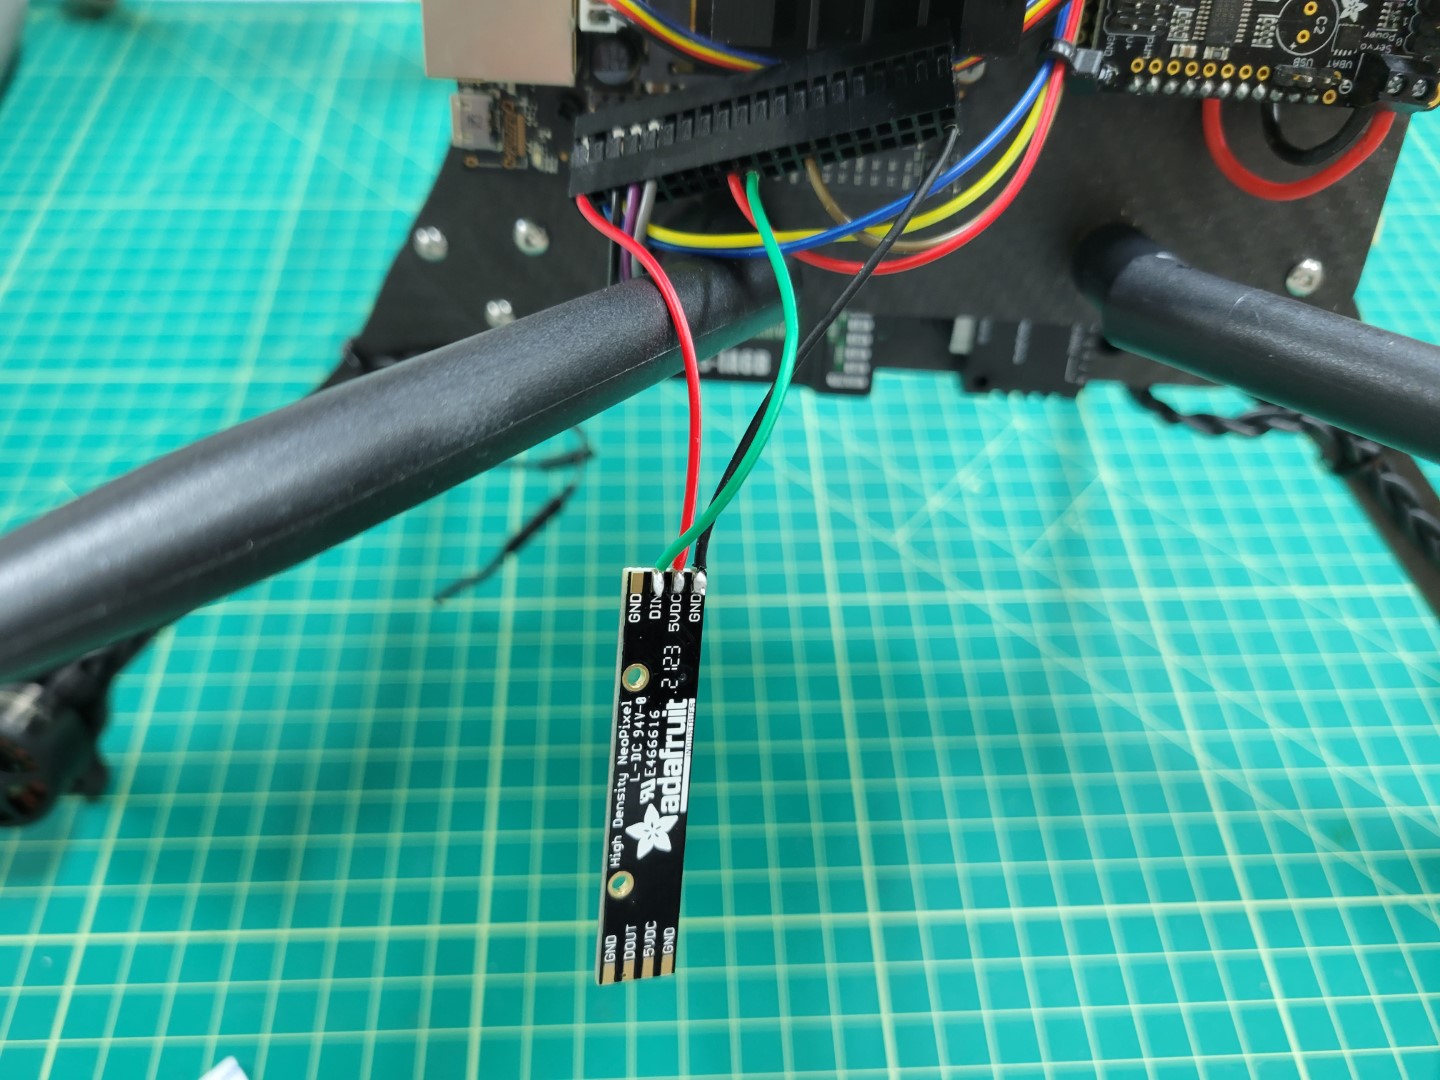
LED connected to VMC housing
Mounting
Use 3M double-sided foam tape to mount to the fan of the Jetson facing towards the rear of the drone.
Adhesive for mounting LED
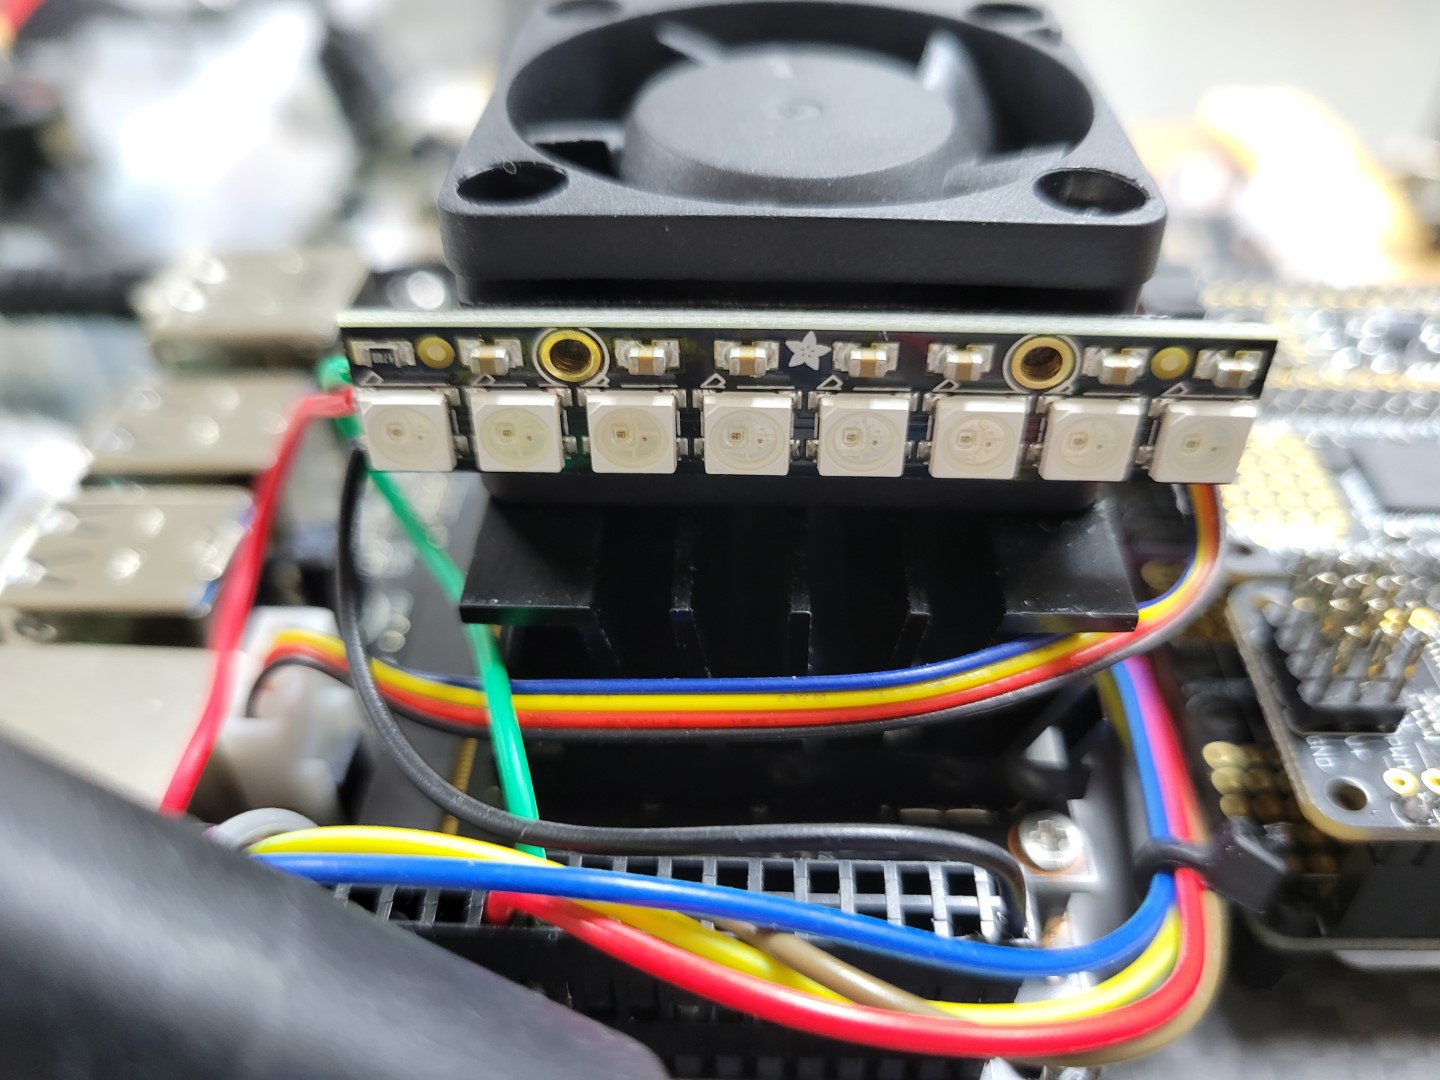
LED mounted on rear side of cooling fan
Testing
Commands run in video:
cd AVR-2022/VMC/
./start.py run -n
Feel free to explore and try different combinations for what you think is the most useful information. For instance if you are doing just a flight test with no peripherals you may want to try the following.
cd AVR-2022/VMC/
./start.py run status -m
Light Definition
| Module: | Message: | LED: | Color: |
|---|---|---|---|
| VIO: | “avr/vio” | 1 | PURPLE |
| PCM: | “avr/pcm” | 2 | AQUA |
| Thermal: | “avr/thermal” | 3 | BLUE |
| FCC: | “avr/fcm” | 4 | ORANGE |
| AprilTag: | “avr/apriltags” | 5 | YELLOW |
←Previous Next→