This is the multi-page printable view of this section.
Click here to print.
Return to the regular view of this page.
Autonomy and Beyond
Teams are encouraged to learn and practice programming with their drone. While it is
not mandatory, programming the drone to perform tasks autonomously will give you an
edge in the competition.
To gain an understanding of how autonomy works with the AVR drone please watch the video below.
Warning
Please make sure you know how to take manual control of your drone and update the home
location prior to launching your autonomous code.
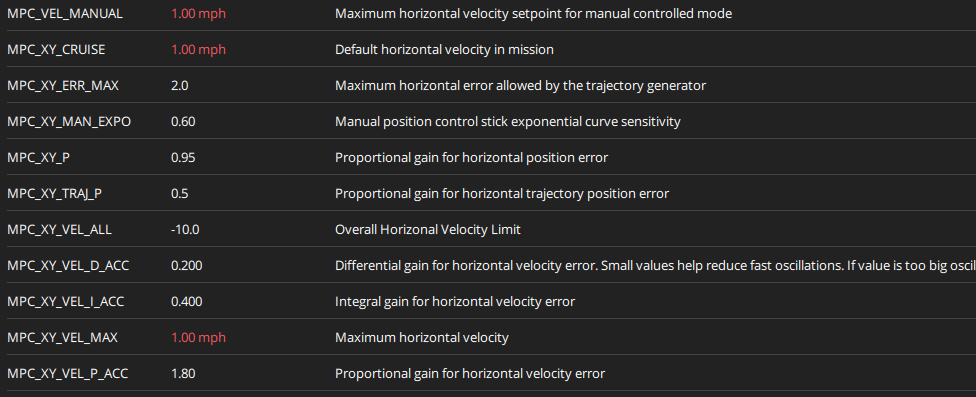
Once you gain an understanding of how autonomy works through simulation you are ready to run your code on the real AVR drone. Make sure you pay attention to the following parameter:
MPC_XY_VEL_MAX
The default autonomous flight speed in PX4 is too fast for the AVR game court. You will need to slow it down. Our recommendation is something around 0.25 to 0.5 m/s, which is roughly 0.5 to 1 mph.
The example below demonstrates how we’ve set this param to 1 mph.
AVR drone right side view
Warning
Failure to lower the autonomy speed of your drone can lead to a crash and the need to rebuild your drone. Start slow and increase the MPC_XY_VEL_MAX param incrementally.
The following sections will help you with:
- Installing and using VS Code to manage your project
- Installing and using Python
- Installing and working with git
- Using the Bell AVR sandbox environment
- Building and running your code with Docker
1 - VS Code
VS Code is a popular open source code editor from Microsoft. It is just one of many IDEs (Integrated Development Environments) that can be used to write and test code. You will be using VS Code to build custom software for your drone.
VS Code can be downloaded and installed from the following Link: VS Code Install
Once VS Code is intalled, take some time to familiarize yourself with the user interface. An intro to the layout and basic feature of VS Code can be found here.
In the next step, we will get Python installed and test example scripts on your machine.
2 - Python
Python is a general purpose programing language. Being one of the most popular programming languages in the world, Python is known for readability and accessability. This section will walk you through installing Python and testing it on your machine.
VS Code Extension
Before we get started, make sure you have the Visual Studio Code extension for Python. Go to your extensions tab, search “Python”, and install.
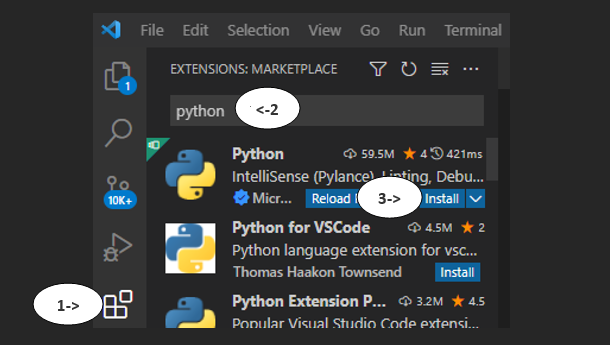
Installing the Python Extension in VS Code
This extension allows for debugging, auto complete, and python environment managemebnt in VS Code.
Python Interpreter
An interpreter’s job is to take the high-level code written by your team in VS code and to translate it into machine language that is executed by your computer.
The Python interpreter is installed from Python.org - install it from here. Select the installer and run through the installation process.
To confirm your installation, open a command prompt window and execute the following command:
If your installation was successful, the output window will show the version of Python you have installed.
Setting Up a Project
Let’s set up a central location to store your future projects. Start by creating a “Projects” folder somewhere on your PC. Within this folder, make a “Hello World” folder. This is where we will create your first project.
In a blank VS Code window, open up this folder:
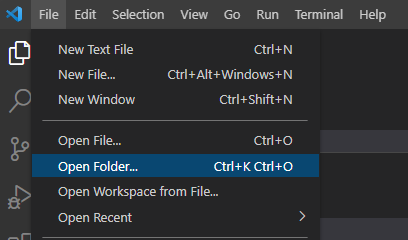
Opening a new folder from file
In your new workspace, create a new file called “hello.py”. The “.py” file format denotes a script written in python.
In this file, type the following:
Congrats, you’ve written your first python script! Before we run it, we will need to set up a python environment.
Setting Up a Python Environment
An “environment” is the context in which the python program runs. It consists of an interpreter and installed packages. We will be using “virtual environments”. These are are environments that are project specific and stored within the project itself. To create one in your “Hello World” project, start up a terminal.
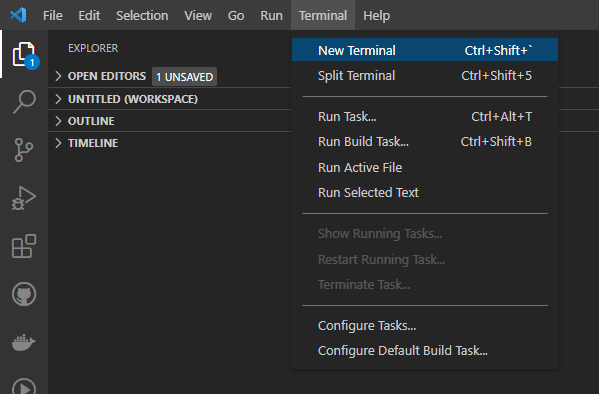
Opening a new terminal in VS Code
In this terminal, type the following to create the virtual environment folder in your project:
To activate the environment:
The environment should now be activated. You’re now set up to run your script. In the terminal, type and execute:
If you were successful, you should see “Hello World” printed in the console.
3 - Git
In writing software for your drone, you will both need to interact with the sandbox environment as well as collaborate with your peers working on code from different machines. “Git” is built for tracking and managing changes between files. It is a staple of modern code management.
Windows Install
To install Git, simply select the standalone installer from the git-scm website
Run through the installation process. Once the install is completed, you will need to setup a username and email address for your machine.
Jetson Install
Git is already installed on your Jetson.
Git Configuration
Git needs to know who you are.
To set up a username and email address, open a terminal and type the following:
git config --global user.name "yourusername"
git config --global user.email "email@youremail.com"
Remember this email, because you will need to add it to your GitHub account later.
4 - GitHub
The AVR codebase is currently hosted on GitHub. Not to be confused with Git, GitHub is a cloud-based hosting service that lets you manage Git repositories. In order to customize the software on your drone, we ask you to create your own account, join an organization for your team, and host a version of that project in github
GitHub Account
To get started, follow this link and create an account. If you already have a GitHub account, you are free to use that.
Organizations
You’ll want to create a group where you can set access permission for your code to the rest of your team. In your profile settings, add an organization. If an organization has already been made, ask your team leader for access.
Forking a Repo
Bell engineers have created the base AVR repository here. If you’d like to make changes to this codebase in order to modify your drone, you will need to fork the repository.
A fork is a copy of a repository. You will be able to make changes to the code without modifying the Bell codebase. To fork the AVR codebase, click on the fork button on the top right of the AVR GitHub Repository. If someone on your team has already done this, ask them to share access with you.

Bell AVR GitHub Page
Take note of the url of the repository you just made.

URL of the new repository
We will need to change the upstream URL on your Jetson. Run the following commands:
git remote set-url origin https://github.com/your-username-here/AVR-2022
Your Jetson should now be configured for your forked Repo.
Syncing with the Bell Repository
If the Bell team makes changes to the main code repository, you will want to update your code fork to include those new changes. Updating your forked repo is simple in Github. Navigate to the main page of your repo, and select this “sync” option:
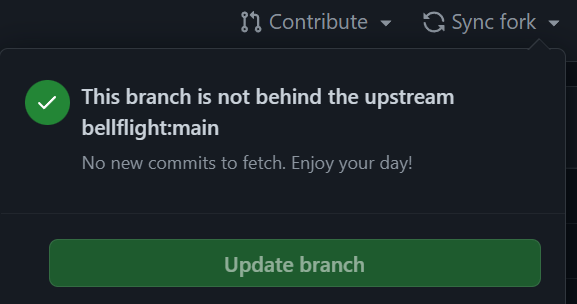
Fork Refresh
This option will allow you to see if your repository is behind. If it needs an update, simply select “Update branch” and sync the repository with your Jetson.
5 - Jetson Development
You should now be able to set up VS Code in order to modify code on your Jetson.
If you have not done this yet, familiarize yourself with using SSH to remote into your Jetson.
Take note of the username of your Jetson, and the host IP address.
Remote Development with VS Code
VS Code has extensions that allow you to develop from a remote machine. From your VS Code window, install the remote development extension, from Microsoft.

Remote Development Extension
Bring up the command pallette in VS Code by pressing Ctrl+Shift+P. Search “SSH” and select “SSH: Connect to Host”

SSH Connect To Host
Type your username@IPaddress and press enter. Select “Linux” as your operating system. You may be prompted at several times to enter the password to your Jetson.

Operating System Selection
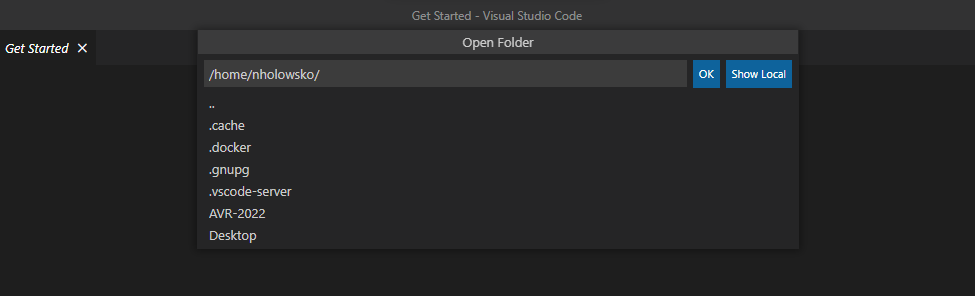
A seperate VS Code window should open. You now have access to the directories on your Jetson. On the left pane, select “Open Folder”.
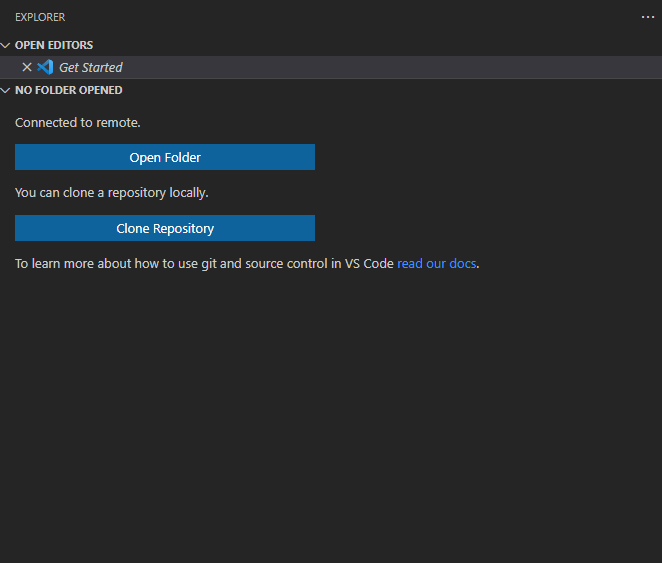
List of directories on the Jetson
When prompted, select the AVR-2022 location and press “OK”.
You should now be ready for development on your Jetson.
6 - Sandbox
Your team will need to create a sandbox environment to develop from.
In the
GitHub repository
we’ve provided an area for you to write
Python in order to accomplish your goals. The software stack for AVR is
made up of a series of modules, which are actually independent
Docker Containers.
Below is a graphic that shows the individual containers:
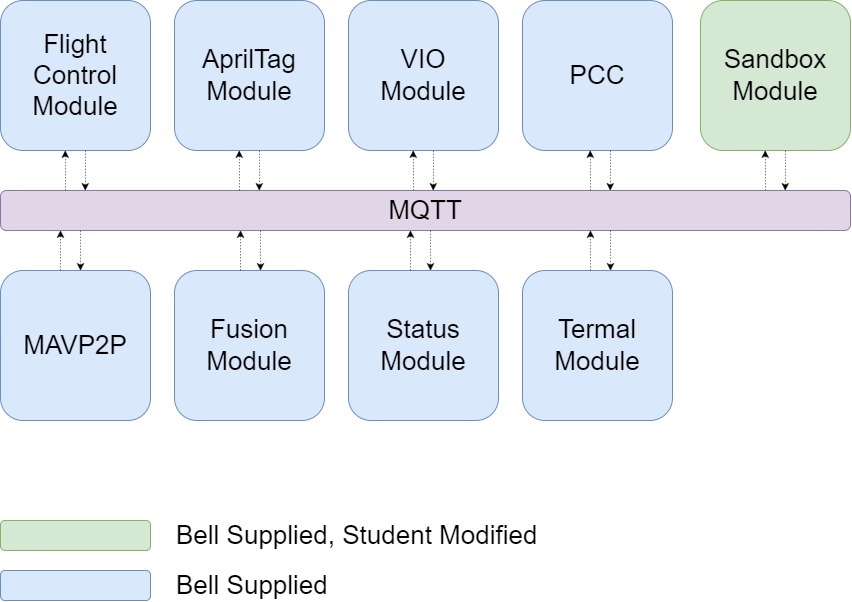
All of these modules communicate with each other over a message bus called
MQTT.
You could loosely think of MQTT like a social media feed.
You can publish posts and your friends can subscribe to your feed to see them.
Similarly, you can subscribe to your friends’ feeds and see their posts too.
Below is a non-exhaustive list of the kinds of data some of the modules publish:
- Flight Control Module
- Drone Position
- Drone Orientation
- Drone Velocity
- Drone Flight Mode
- Drone Battery Level
- AprilTag Module
- Visible AprilTag IDs
- AprilTag relative Positions
- VIO Module
- Zed Mini Position
- Zed Mini Velocity
- Zed Mini Confidence
- PCC Module
- Laser States
- Gimbal Control
- Fusion Module
- Coordinate Transformed Drone Position
- Thermal Module
- Status Module
You can read more about these modules here.
Your task here will be to subscribe to the
necessary topics above and write your own logic to produce the
desired output.
Using MQTT
You will be using the sandbox module to read from and interact with the other modules. By publishing messages to MQTT, you can create custom actions for your drone. The sandbox module has some example code to help you get started.
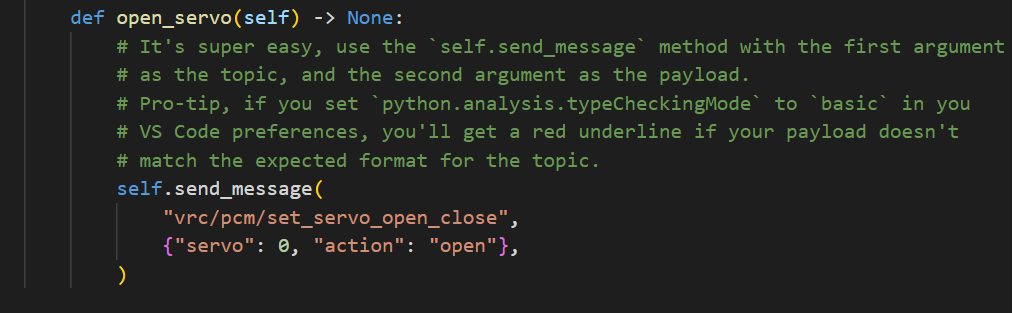
Example function that opens a servo
For full documentation of the MQTT topics and payloads available, go to
https://pypi.org/project/bell-avr-libraries/
and scroll down to “MQTT Documentation”.
7 - Using Git
This section will intorduce you to the basics of using git and will walk you through an example using VS Code.
Basics of Git
Git has a handful of basic commands that are useful to know. These can be executed from the command line, but we encourage you to use VS Code’s GUI as you get started.
We will primarily focus on commit, push, and pull.
-
A commit is used to capture the state of the project at a point in time. It saves any additions or changes to the local repository from your workspace.
-
A push adds all commited files to the remote repository. In this case, your remote repository is hosted in GitHub.
-
A pull gets files from the remote repository and puts them directly in your local directory. You will need to manually manage issues between conflicting files.

Example Git action diagram
VS Code Example
This will walk you through a Git command example using VS Code and the local repository on your Jetson. To start, make sure you have a VS Code window open with remote SSH access. Refer to previous steps for instructions on how to do this.
You should have an editor window on the left that looks like this:
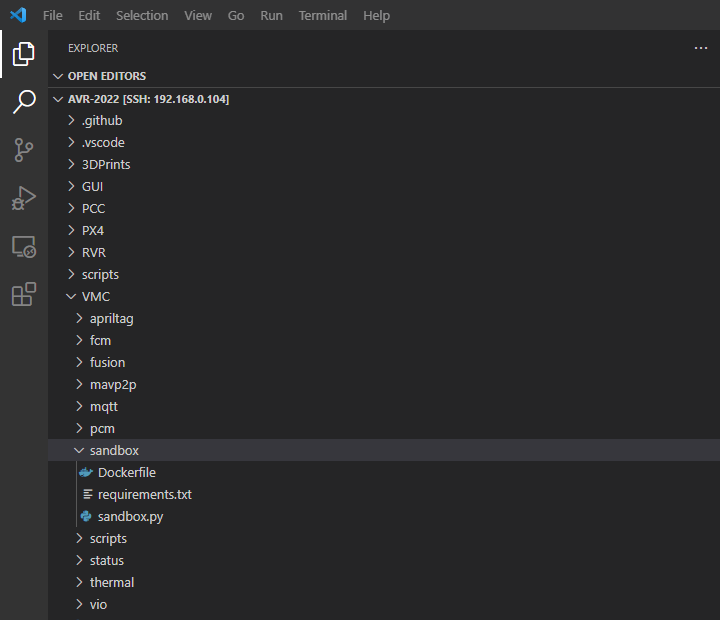
Since you will be developing in the “sandbox” folder, we will experiment with that. Go ahead and add a new file. To do this, right click “sandbox” and “add new file”. Call it “test.txt”.

New test file in the sandbox directory
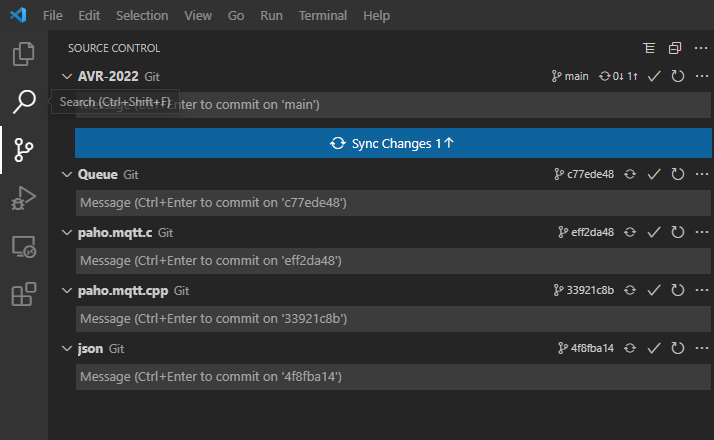
You’ve now made a change in your workspace, you can now commit it. Select the “Source Control” icon on the left pane of VS Code:
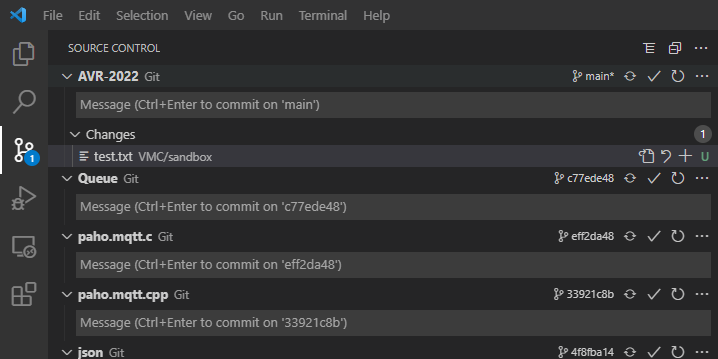
Source Control
The test file you made should show up in source control. Click the “+” button to commit the change. It will now be “staged”. In the upper text box, append a message to this commit describing the contents.:
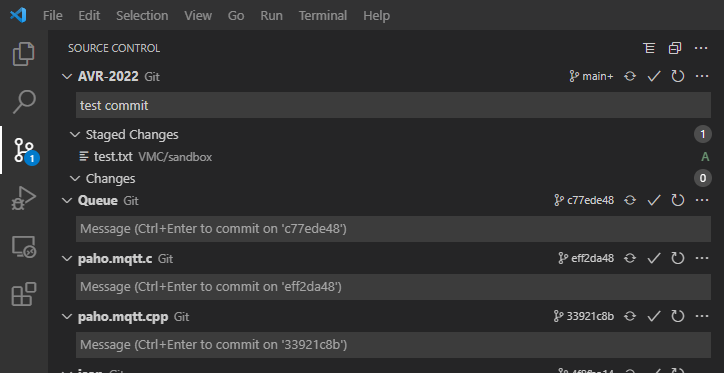
Staged change with message
Click the check mark to commit the change. It is not saved in your local repository. The last step is to store this change in GitHub. The “Sync Changes” button that appears gives theuser the option to automatically pull and push to the remote repository. Select this to complete the process.
Pulling and Pushing your change
In the future, when working with others on your team, it may be necessary to manually manage conflicts when syncing changes.
8 - Docker
A Docker container is a lightweight executable package of a software that includes everything needed to run an application. In the AVR software package, parts of the code running on the Jetson(MQTT, AprilTag, Flight Control, etc.) are all run on individual Docker containers. You learned how to initialize and run them on the Jetson in the software section of this guide.
As a reminder, make sure to run the setup each time you want to pull the latest version of each of the modules.
cd ~/AVR-2022/VMC/scripts
git pull
./setup.py
To run the modules, use the start.py script.
cd ~/AVR-2022/VMC/
./start.py run
Your sandbox environment will be one of these modules. A basic sandbox.py script has been created for you. To run this specifically:
Each time you make changes/additions to your sandbox.py script, you will need to rebuild the module before running again.
Done!
Nice work. You’re now ready to start experimenting in the sandbox module!